
How To Use ShareASale
ShareASale is an affiliate network that houses a variety of programs. Everything you need is located right in your ShareASale dashboard and this step-by-step tutorial will take you through each tool and how to use it.
If you do not yet have a ShareASale account, you can sign up for one here: https://www.shareasale.com/newsignup.cfm
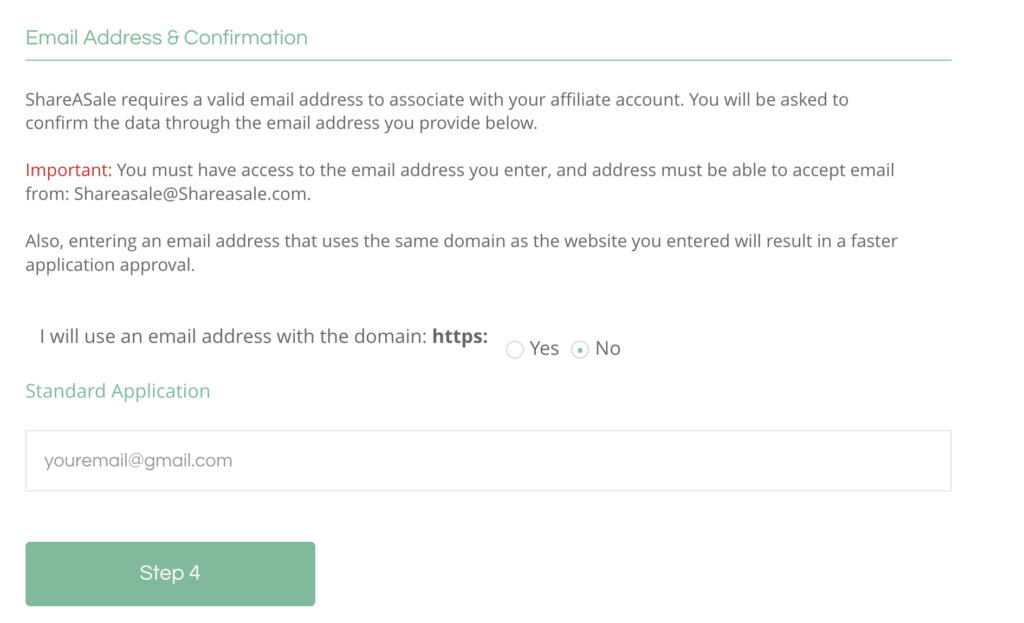
If you do not have a blog or website, you can use a social media platform URL such as your public Facebook Page or public Instagram account in the “Website URL” field. However, if you do this, make sure that you choose the option NO in step 3.
Once your application has been submitted to ShareASale, it can take several days to receive the approval email. Be sure to keep an eye on your inbox in case ShareASale asks for any further information about your account.
If you are applying for an Apogee program, you can email Lynsey at [email protected] to help speed up the approval process. Likewise, if you are denied a ShareASale account, please reach out to Lynsey for assistance.
The link to login to ShareASale is: https://account.shareasale.com/a-login.cfm
Make sure that you use the correct email address that you used to apply and check the CAPTCHA checkbox. Sometimes it takes a moment to load.
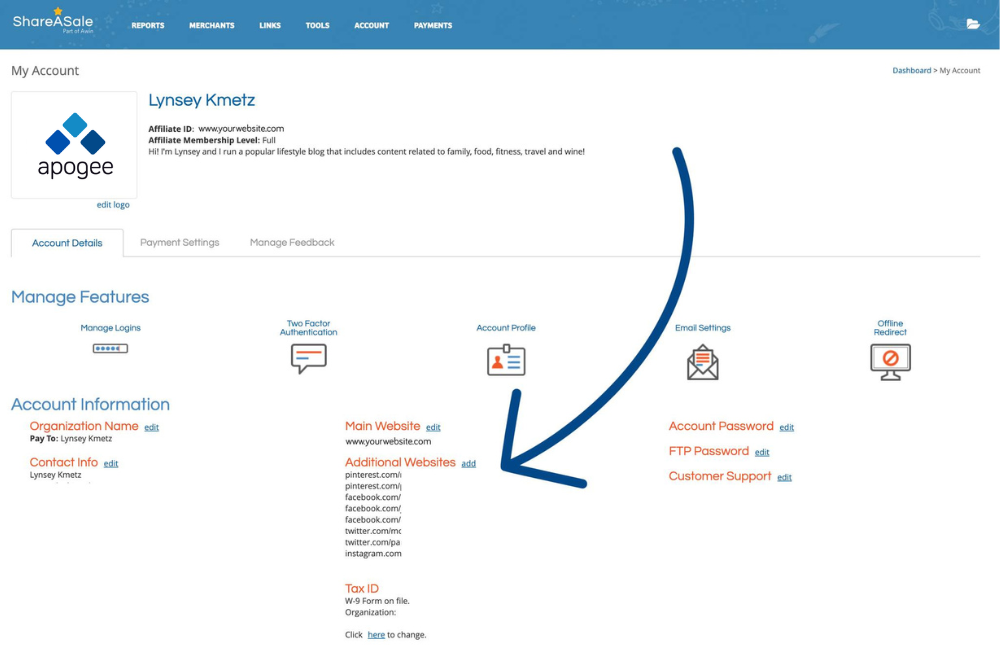
Make sure to keep your ShareASale Profile up to date. This will help you in both the approval process for joining a new program and also makes sure all of the links that you share comply with the ShareASale Terms of Service.
Begin by making sure ALL of the properties where you intend on sharing affiliate links are listed – this includes all of your websites as well as your social media profiles.
Also make sure your W-9 form is on file and that your Payment Settings are properly set up so you will receive your payments.
On ShareASale, brands are called Merchants. So, once you are logged in, go to Merchants -> Search For Merchants.

From there you can search (1) for a specific brand name, website, product, or type of product (such as “orthopedic shoes.”)
If you put in a product type or category, you will be given a list of brands (merchants) that have that type of product. You can see in the results the commission rate, the “Power Rank” on the ShareASale Network (a grading system on ShareASale that factors in the commissions and conversions of the program = the lower the number the better), and the EPC which is the Earnings Per Click. The EPC is the average amount of money earned each time someone clicks on an affiliate link.
Once you have chosen the program that you want to join, click on “Join Program.” (2)

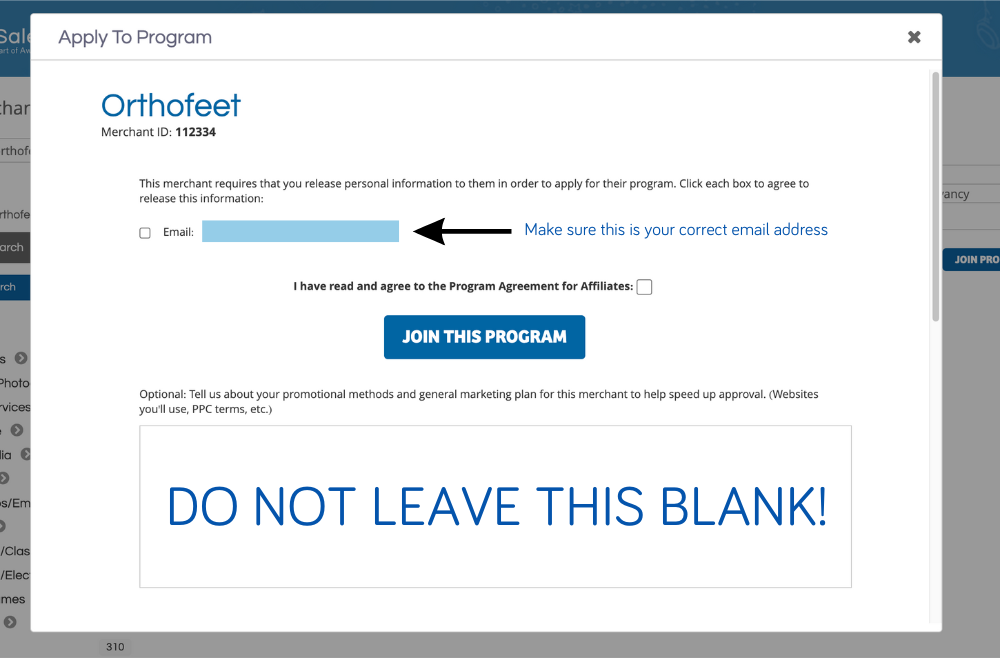
A lightbox window will appear with more details about the affiliate program. You will need to complete this step in order for your application to be sent to the affiliate manager for this specific program. You need to make sure your email address is correct and click that you are agreeing to the program terms (which can be found further down on this page.)
Under the Join This Program button is a box for you to explain WHY you want to join this affiliate program. DO NOT LEAVE THIS BLANK. When affiliate managers are choosing who to let into an affiliate program, they need to know that the person on the other end of the application is a real person who intends to promote the program. Yes, it takes an extra few moments to fill out, but taking the time to do so will vastly increase your chances of being accepted into the program.
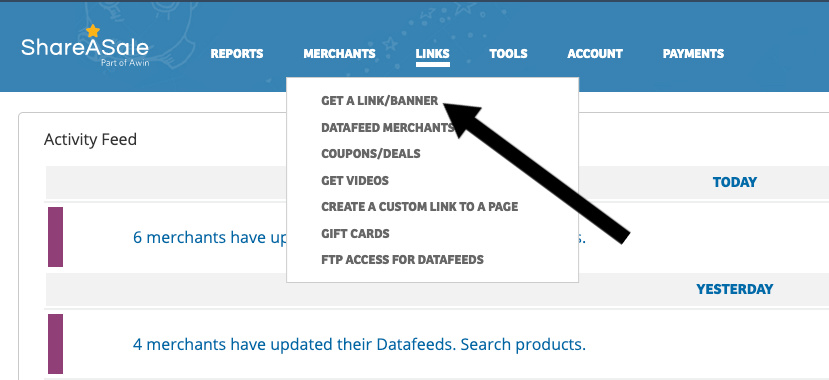
From the home page, click on Links and then Get A Link/Banner. You want to ensure your email address is correct and check the box that you have read and agree to the Program Agreement. You can find the program terms by scrolling down on this page.
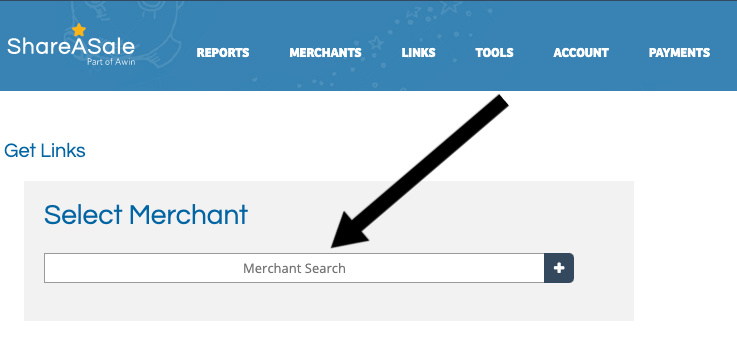
Then choose the program from the Merchant Search drop down menu.
This will open up the dashboard for each program. From here you can access your custom tracking link, additional direct tracking links, banners, creatives, coupon codes, and more.
At the top of the screen, (1) you will see the Default Text Link. You can easily grab and share this link to route your audience to the brand's homepage.
Beneath the Default Text Link is a menu that includes Text Links, Banners, Create Custom Link, and Deals/Coupons. The other options – Datafeed, Product Showcase, and Make-A-Page, are for partners running datafeed sites and will generally not be of any use to content creators.
The first section includes Text Links that go to specific landing pages on the brand's site. These are links created to help you link to specific products easily.

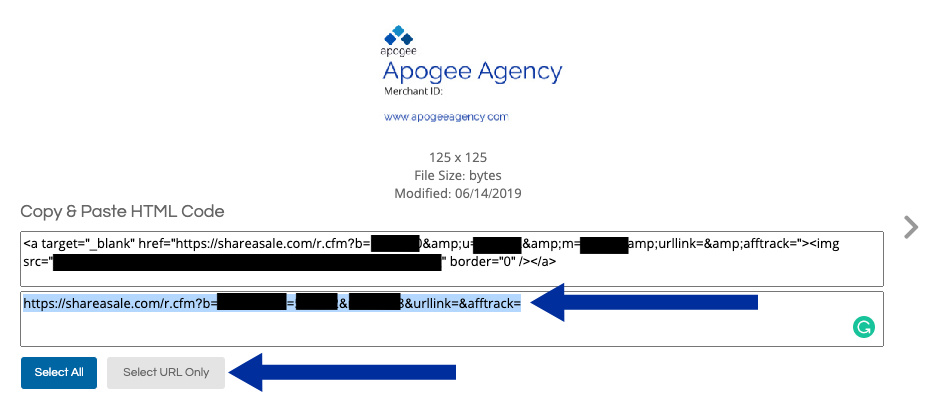
To get the HTML Code or Embed Code for these links, click on Get HTML Code on the right-hand side and then copy and paste into the HTML of your content. This will attach your tracking link to the exact phrase of the text link.

If you only want the direct URL, you can do that as well. Click on Select URL Only and a second box will appear with the URL for the deal.
If you do not see a text link for a specific product you want to promote, you can choose to create a custom link to any specific product using the Create Custom Link Tool. (1)
Put the full URL of the page you want to link to into the Custom Link Generator (2) and hit Create Custom Link. (3) This link will now route your audience to that specific page, keeping all of the necessary tracking codes in place to ensure you receive credit for any sales through that link.
Optional: You can choose to add a tracking value (UTM parameter) that will show up in Google Analytics.

Which Links Should I Use Where?
Choosing which link type to use depends on where you will be sharing your links and how you will be instructing your audience to use them.
Text links
The Default Text Link that is displayed at the top of the Merchant Link Page will take your audience to the homepage of the brand. This link is great for use on your Social Media Bios or LinkTrees as it sends your audience directly to the site for them to shop around. In this example, the Default Text Link would take your audience directly to Orthofeet.com.
The additional links on the Text Link Page as well as any Custom Links you create are perfect for sharing in social media posts and stories as they take your audience directly to the product you are talking about. These links are also great for your email newsletter as they save your readers time and make it easy to buy the exact product you are sending them.
Banners
Banners are great for adding additional visual context to your content. The Banner HTML is great for use in sidebars of blogs and email newsletters where you can enter HTML code. However, banners should always be used in conjunction with a text link when used in the body of an email or blog post.
Additionally, you can download the images from the Banners section to use in social media which does not allow for HTML to be entered (such as Facebook and Instagram) but remember to then include a text link in the caption as the image itself will not be clickable.
When a ShareASale link is clicked, a tracking pixel of “cookie” is set in the web browser. This “cookie” then sits in the browser until a purchase is made or the tracking gap or “cookie window” expires.
When you hover over or click on an affiliate link, you may see it briefly route through ShareASale before landing at the final destination. This is the process of setting the cookie into the browser.
When you look at a ShareASale link you will see several sections of code – each one plays a crucial role in the affiliate process, which is why you never want to alter an affiliate link code.
Every ShareASale link has the following data in the string:
- b = banner: the numerical ID identifying the kind of link you’ve chosen (ex: text or banner)
- u = user: the numerical ID of the affiliate or “user” (your personal affiliate ID)
- m = merchant: the numerical ID of the merchant (brand you are promoting)
- d = deal: the numerical ID used when a coupon or deal is involved (if applicable)
In order for links to properly track, the b, u, and m data must be present. If you want to shorten your link to make it easier to share or remember, we suggest you use PrettyLinks if you have your own domain.
Banners are visual ads which track the same way as text links. Banners work great in addition to text links and should not be the only form of promotion. Each program has a variety of banner images that you can easily embed into your content or use on social media.
To embed a banner into content, choose Banners from the menu in the middle of the page to see what is available. This view also gives you the sizes of each banner displayed underneath. If you need a custom size, please just email us and we will get one to you as quickly as possible.

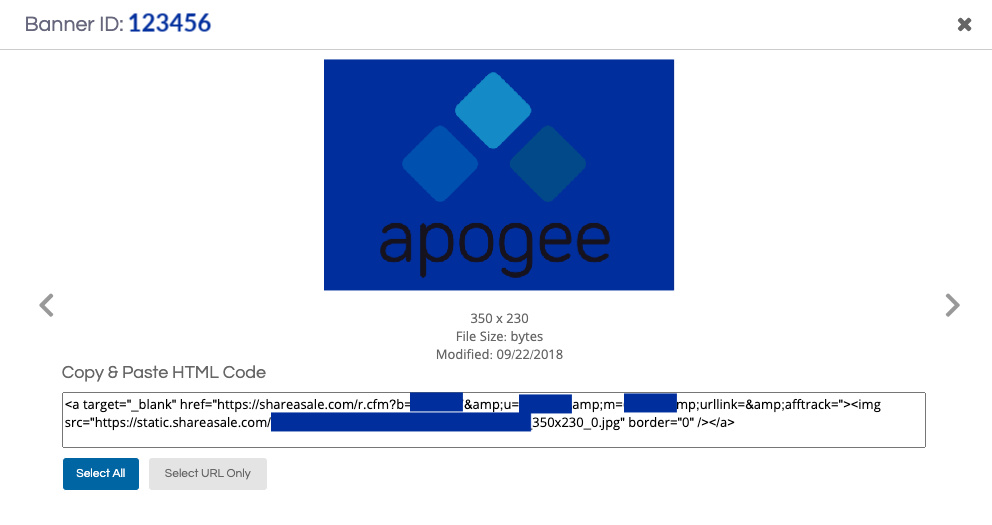
Once you have decided which image you would like to use, click on the image. Then you have two options: 1. embed the image with your tracking link or; 2. save the image to upload.
To embed a banner image, copy and paste the coding that appears below the image into the HTML tab of your content.
To save the image for use in social media and uploads, right-click the image and save to the folder of your choice.
The last tip for today includes finding the active coupons available for your ShareASale affiliate programs. These coupons change periodically, so it is good practice to check to make sure coupons are active before sharing. New coupon codes go out every month in the program affiliate newsletter.
To get the current active coupons, click on Deals/Coupons from the menu in the center of the page. This will open the coupon details including the current deal, date of expiration, coupon code and your tracking link.

Note that in order for you to get credit for the sale you will need to instruct your reader to click on your link and use the coupon code at checkout.
How And When Do I Get Paid?
With ShareASale Network, you get paid once a month for all the commissions you've earned from the affiliate programs you're part of. The minimum payment threshold is $50.
You can choose to be paid by direct deposit, mailed check, or wire deposit. You can edit your payment preference by going to Account -> Account Settings -> Payment Settings.

The ShareASale “Pay Day” is the 20th of each month for the previous months' transactions. This means that your June commissions will be paid on July 20th.
If the 20th falls on a holiday or weekend, the payments are sent the following business day. This means that if July 20th falls on a Saturday, the payments will be sent on July 22nd – the Monday following the scheduled payday.
The exception to this pay schedule is if a particular merchant has an extended Lock Date which allows the brand time to reconcile any returns or fraudulent orders. Thankfully, Apogee programs do not have this extended lock date – just another benefit to working with Apogee-managed programs.
For additional details on how ShareASale commissions are paid or how you can make changes to your payment preferences, please click here.
Affiliate Disclosure
Each instance you distribute an affiliate link, whether it's on a blog or social media platform, mandates by law that you disclose your affiliation with the company. According to guidelines from the Federal Trade Commission (FTC), any association between the endorser and the seller of the promoted product must be completely disclosed.
This disclosure must come before the first link is shared and needs to be clear and concise and not be hidden or inconspicuous. It is suggested that you use natural language to simply explain to your audience that if they make a purchase from your link or code you will earn a commission at no cost to them.